

With its deeply caramelized, dark top and impossibly creamy, melt-in-the-mouth centre, the classic Basque burnt cheesecake is the ultimate celebration of texture and flavour contrast. Born in the pintxo bars of San Sebastián-most famously La Viña-this iconic Spanish dessert breaks every rule of traditional cheesecake baking: there is no biscuit crust, no delicate water bath, and no fear of cracks.
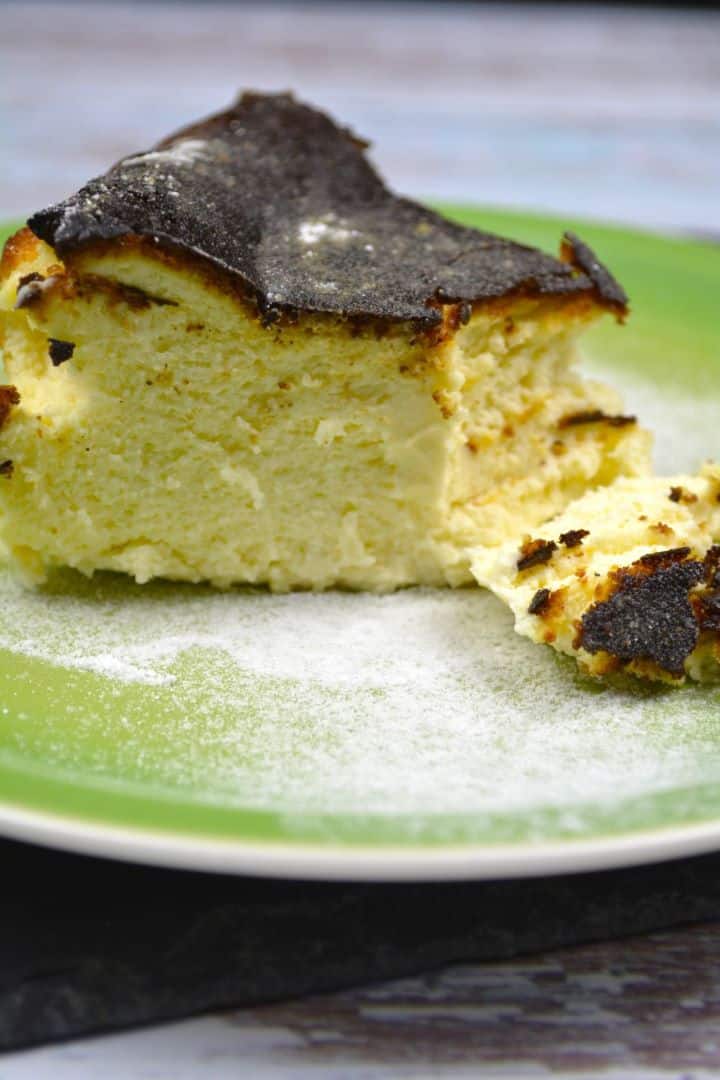
Instead, high-heat baking creates an intensely rich, bittersweet caramel exterior that balances the luscious, custardy interior. Made with just six simple ingredients, this foolproof recipe guides you through the exact baking times, tin preparation, and the signature "wobble test" to ensure your cheesecake turns out perfectly creamy every single time.
Jump to:
- Why You'll Love This Recipe
- Key Ingredients & Baker's Notes
- Essential Equipment
- Watch the Video Tutorial
- How to Line the Pan (The Rustic Basque Method)
- Step-by-Step Baking Instructions
- The "Wobble Test" & Cooling Protocol
- How to Serve Basque Burnt Cheesecake
- Storage & Make-Ahead Instructions
- Troubleshooting Common Basque Cheesecake Mistakes
- Frequently Asked Questions
- More Classic Bakes to Try Next:
- Let's Connect & Share!
- related
- Authentic Basque Burnt Cheesecake (Ultra Creamy San Sebastián Recipe)
If you love baking international favourites like my rustic Hungarian Traditional Baked Cheesecake or the comforting simplicity of my Russian Cheesecake, this Spanish classic is your next must-bake. Unlike a dense New York bake or a fruity Raspberry Cheesecake, the Basque style strips away all the fuss-no biscuit crust, no water bath-delivering pure, melt-in-your-mouth luxury in every bite.
Why You'll Love This Recipe
- No Crust Needed: Skips the biscuit base entirely for a pure, velvety cream cheese experience.
- Foolproof Method: Zero water baths or complicated techniques-just mix, pour, and bake hot.
- Rich Flavour Balance: The bitter notes of the caramelized crust naturally cut through the sweetness and rich dairy.
- Make-Ahead Friendly: Tastes even better the next day once chilled to your preferred consistency.
Key Ingredients & Baker's Notes
Using the right quality and temperature of ingredients makes all the difference in achieving the signature contrast between a dark caramel exterior and a molten, custardy centre.
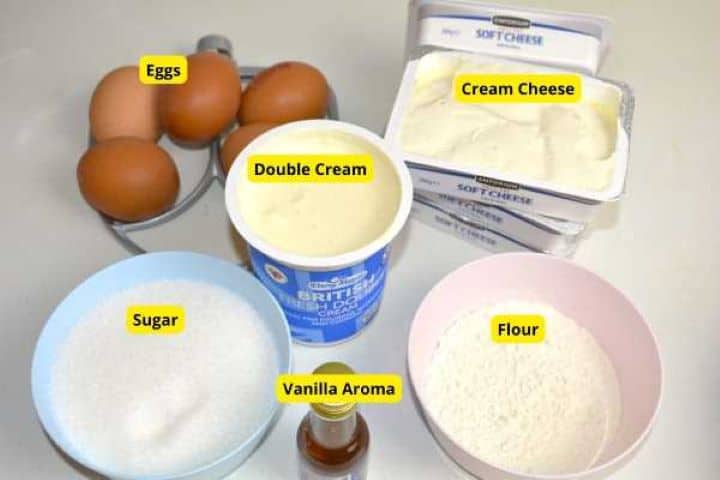
- Full-Fat Cream Cheese (800g): The rich base of your cheesecake. Always opt for standard full-fat cream cheese (like original Philadelphia). Low-fat or spreadable varieties have higher water content and will make the bake soggy. Baker's Tip: Remove it from the fridge at least 1-2 hours ahead so it is fully at room temperature before beating.
- Caster Sugar (150g): At 150g, this recipe delivers a balanced sweetness that lets the natural tang of the cream cheese and the deep caramel notes on top shine without being cloying. Caster sugar dissolves quickly into the cheese without leaving graininess.
- Free-Range Eggs (5 large): Eggs provide structure, lift, and that classic custard texture. Use room-temperature eggs so they emulsify easily into the batter without curdling the cream cheese.
- Double Cream / Heavy Cream (300ml): High fat content gives the cheesecake its signature velvety, melt-in-the-mouth crumb. Ensure you use heavy double cream rather than single cream or milk.
- Wheat Flour (3 tablespoons): A small amount of plain wheat flour gently stabilizes the custard as it rises and falls, keeping the centre creamy rather than runny. (For a gluten-free variation, replace 1:1 with cornstarch).
- Vanilla Essence (1 teaspoon): Adds warmth and rounds out the flavour profile.
- Fine Sea Salt (¼ teaspoon): A pinch of salt is crucial-it enhances the sweetness and balances the richness of the dairy.
Essential Equipment
- 8-Inch (20 cm) Deep Springform Pan or 9-Inch (23 cm) Cake Tin: With 800g of cream cheese and 5 eggs, this batter produces a tall, generous cheesecake. Ensure your 8-inch pan has deep sides (at least 7-8 cm / 3 inches tall).
- Baking Parchment Paper (2 large sheets): Crinkled and layered to line the pan. The paper should extend 2 inches (5 cm) above the pan rim to hold the batter as it puffs up in the oven.
- Electric Mixer or Hand Whisk: A hand mixer or stand mixer with a paddle attachment mixes the batter effortlessly on low-to-medium speed. Avoid high speeds to prevent beating excess air into the mixture.
- Fine-Mesh Sieve: For sifting the flour to guarantee a silky-smooth batter with zero clumps.
- Silicone Spatula: For scraping down the bowl between additions so every bit of cream cheese is incorporated evenly.
Watch the Video Tutorial
Prefer a visual guide? Watch the step-by-step video tutorial below to see the exact batter consistency, pan lining technique, and the signature "wobble test" in real time before you start baking.
How to Line the Pan (The Rustic Basque Method)
Traditional Basque cheesecake relies on a crumpled parchment paper technique to create its signature ruffled edges and prevent the batter from sticking or leaking:
- Cut two large sheets of baking parchment paper (each about 40 cm / 16 inches square).
- Crumple both sheets tightly into balls with your hands, then flatten them out. Crumpling softens the paper, making it pliable enough to press neatly into the corners of your tin.
- Lightly grease the inside of your 8-inch (20 cm) deep springform pan with butter or oil to help the parchment adhere.
- Layer the sheets: Press the first sheet into the pan, then lay the second sheet across it at an angle so all sides are covered.
- Ensure at least 5 cm (2 inches) of paper extends above the rim of the pan. The cheesecake expands significantly as it bakes and needs the parchment collar for support.
Step-by-Step Baking Instructions
1. Preheat the Oven
- Preheat your oven to 210°C Fan / 230°C Conventional (425°F - 450°F). Place the oven rack in the middle position. High heat is essential for scorching the exterior while leaving the centre creamy.
2. Beat the Cream Cheese and Sugar
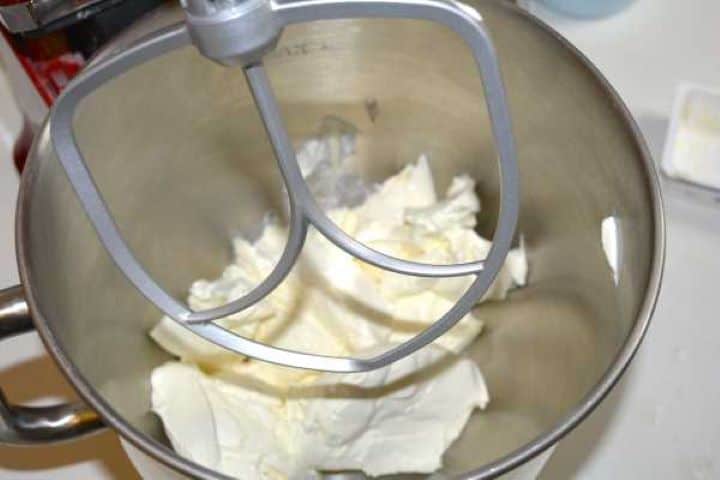
- In a large mixing bowl (or stand mixer fitted with the paddle attachment), beat the 800g room-temperature cream cheese and 150g caster sugar on low-to-medium speed for 2-3 minutes until completely smooth, creamy, and free of lumps. Scrape down the sides and base of the bowl with a silicone spatula.
3. Add the Eggs One by One
- Add the 5 free-range eggs one at a time, mixing on low speed just until each egg is fully incorporated before adding the next. Do not overmix or whip on high speed-excess air bubbles will cause the cheesecake to crack unevenly.
4. Stir in the Cream, Vanilla & Salt
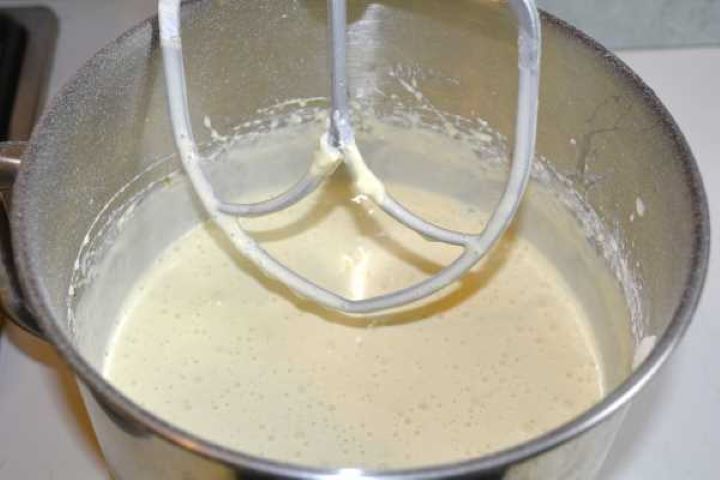
- Pour in the 300ml double cream, 1 teaspoon vanilla essence, and ¼ teaspoon sea salt. Mix on low speed for about 30 seconds until the liquid is fully combined with the cheese mixture.
5. Sift in the Flour
- Sift 3 tablespoons of plain wheat flour directly over the batter. Gently fold it in with your spatula or whisk on low speed until no dry flour pockets remain and the batter is glossy and smooth.
6. Pour and Tap
- Pour the batter into your prepared parchment-lined tin. Give the pan a couple of gentle taps on the worktop to release any large trapped air bubbles.
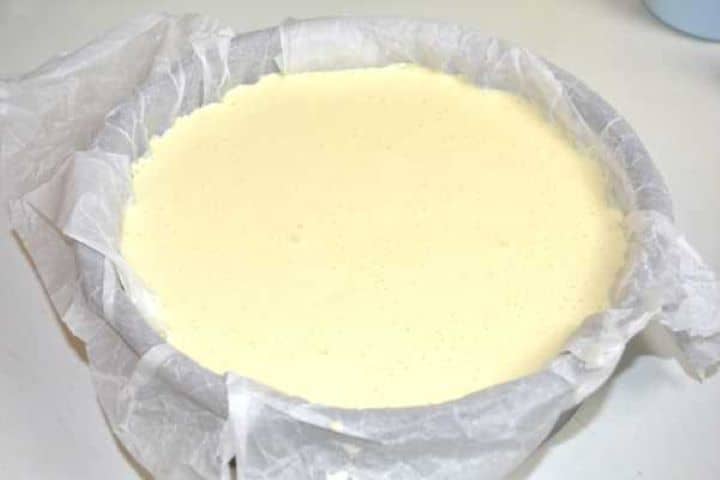
7. Bake to Golden-Dark Perfection
- Bake at 210°C Fan (230°C / 450°F) for 45 to 50 minutes.
- The top should be deeply caramelized (rich dark brown, with darker charred spots around the edges).
- The edges should look set and puffed up, while the centre remains noticeably loose.
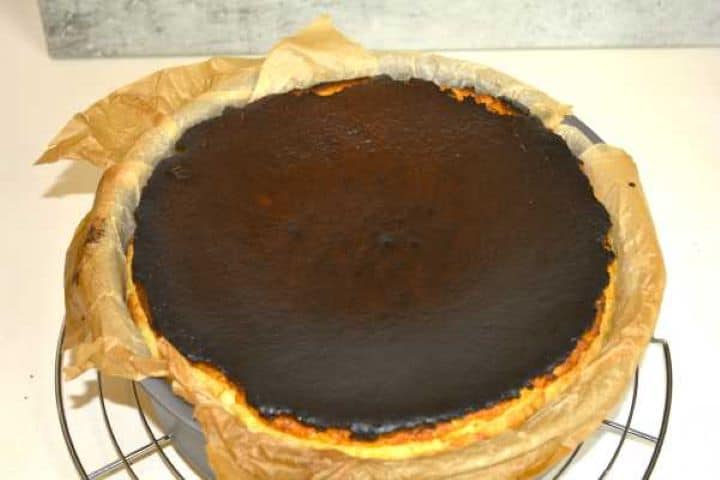
The "Wobble Test" & Cooling Protocol
- The Wobble Test: Gently nudge the cake tin with an oven mitt. The outer 2 inches should hold firm, while the centre 3-4 inches should jiggle like set jelly or custard. If it feels completely liquid, give it another 3-5 minutes. If it doesn't wobble at all, take it out immediately to avoid drying out the centre.
- Room-Temperature Rest (Crucial): Place the tin on a wire rack and let the cheesecake cool completely at room temperature for at least 3 to 4 hours. It will gradually deflate and settle into its classic rustic shape.
- Serving Options:
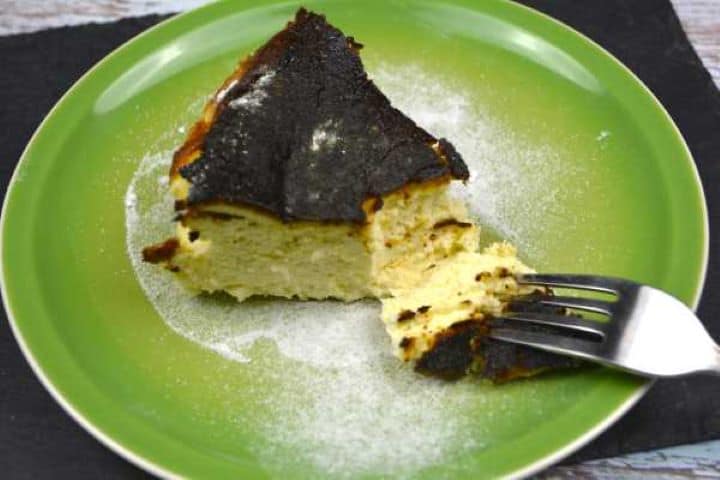
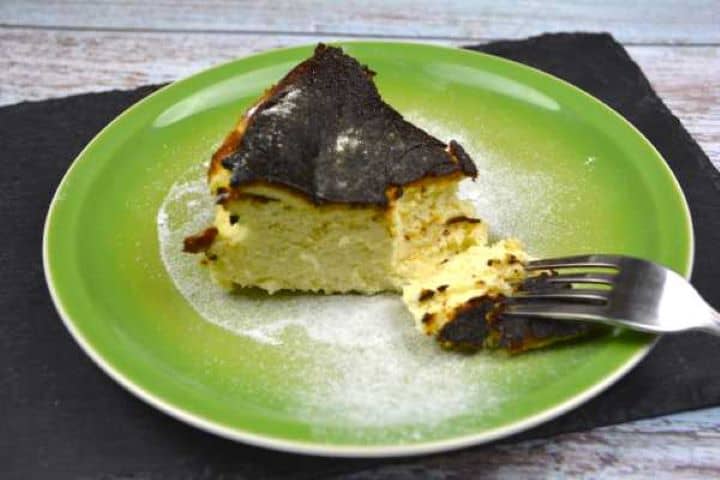
- For an ultra-creamy, molten centre: Slice and serve at room temperature once fully cooled.
- For a firmer, silky custard slice: Chill in the fridge for at least 4 hours (or overnight), then bring it back to room temperature for 20-30 minutes before serving.
How to Serve Basque Burnt Cheesecake
In San Sebastián, Basque cheesecake is almost always served unadorned at room temperature to let the caramelized notes and rich custard texture take center stage.
- The Best Temperature: Never serve it straight from the fridge. Chilling solidifies the butterfat, masking the creamy flavor and silky texture. Take it out of the refrigerator 30 to 45 minutes before serving so it softens to its optimal custardy consistency.
- How to Get Clean Slices: Use a large chef's knife dipped in hot water and wiped dry with a clean kitchen towel between every cut.
- Optional Pairings & Toppings:
- Fresh Berry Coulis: A tart raspberry, blackberry, or cherry compote cuts through the richness of the cream cheese.
- Flaky Sea Salt: A tiny sprinkle of Maldon sea salt on top elevates the dark caramel notes.
- Beverage Pairings: Pairs traditionally with a glass of Spanish cider, a crisp Basque white wine (Txakoli), Pedro Ximénez sherry, or a strong espresso.
Storage & Make-Ahead Instructions
Basque cheesecake is one of the best make-ahead desserts because the flavours deepen and meld together over time.
- Make-Ahead: Bake the cheesecake 1 day in advance. Let it cool completely at room temperature, then refrigerate overnight in its pan. This sets the crumb perfectly while keeping the center lush.
- Refrigeration: Store leftover slices in an airtight container in the fridge for up to 4 to 5 days. Keep the baking parchment attached to the outer edges to prevent the sides from drying out.
- Freezing:
- Wrap individual, fully chilled slices tightly in a layer of plastic wrap followed by a layer of aluminium foil.
- Freeze for up to 2 months.
- To Thaw: Transfer slices to the refrigerator overnight to defrost slowly, then bring to room temperature for 30 minutes before enjoying. Avoid microwaving, as direct heat will melt the delicate custard center.
Troubleshooting Common Basque Cheesecake Mistakes
- The Top Is Pale and Not Browning
- Cause: The oven temperature is too low, or the rack is placed too far from the top element.
- Fix: Ensure your oven is fully preheated to 210°C Fan / 230°C Conventional. If the cheesecake has baked for 45 minutes and still looks pale, move the tin to the top rack or switch on the grill/broiler for the final 2-3 minutes. Watch it closely so it browns rather than chars black.
- The Centre Is Liquid and Soupy (Not Setting)
- Cause: Underbaked or sliced too early while still warm.
- Fix: The cheesecake needs at least 3-4 hours at room temperature (or 4 hours in the fridge) for the residual heat and eggs to gently finish setting the custard structure. If it is completely liquid after chilling, it was pulled from the oven 5-8 minutes too early.
- The Cheesecake Is Dry and Dense (No Creamy Core)
- Cause: Overbaking or ignoring the "wobble test."
- Fix: Pull the cheesecake out when the middle 3-4 inches still jiggles noticeably like set custard. It will continue cooking from residual heat as it rests on the counter.
- Deep, Uncontrolled Cracks Across the Surface
- Cause: Too much air whipped into the batter, or the oven temperature spiked excessively.
- Fix: Mix the batter on low speed only. Do not whip the cream cheese or eggs on high speed. Tap the tin on the worktop before baking to burst large surface bubbles.
- Lumpy Batter
- Cause: Cold cream cheese or cold eggs.
- Fix: All dairy and eggs must sit at room temperature for 1-2 hours before mixing. If lumps persist, pass the batter through a fine-mesh sieve before pouring it into the lined tin.
Frequently Asked Questions
No. The deeply browned exterior undergoes intense caramelization and the Maillard reaction, creating rich notes of toasted marshmallow, caramel, and browned butter. It produces a pleasant, slightly bitter note that cuts through the richness of the sweet cream cheese.
Yes. Substitute the 3 tablespoons of wheat flour with an equal amount (3 tablespoons / ~25g) of cornstarch (cornflour) or a 1:1 gluten-free plain flour blend.
This is completely normal and expected. Without a dense biscuit base or large amounts of flour, the eggs cause the cake to soufflé up during high-heat baking and gently collapse as it cools, forming its signature rustic dip and rippled edges.
Yes. A 9-inch tin will spread the batter into a slightly shallower layer. Reduce the baking time to 40-45 minutes to ensure the center does not dry out.
No. Low-fat cream cheese has a much higher water content and lower fat ratio, which causes the cheesecake to turn watery, rubbery, and split in the oven.
More Classic Bakes to Try Next:
If you enjoyed baking this rustic Spanish dessert, explore more cozy homemade treats from my kitchen:
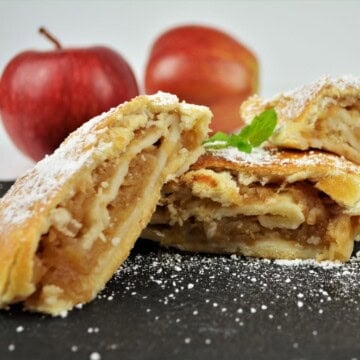
- Easy Apple Cake Recipe - A moist, spiced everyday sponge layered with tender cinnamon apples.
- Apple Shortcrust Pastry Recipe - Crisp, buttery pastry with a rich spiced fruit filling.
- Yogurt Chocolate Loaf Cake Recipe - A rich, crowd-pleasing bake perfect for weekend gatherings.
- Puff Pastry Plum Tart Recipe - Quick, effortless sweet treats ready in under 30 minutes.
Let's Connect & Share!
Did you bake this authentic Basque burnt cheesecake? I would love to see how yours turned out! Snap a photo and tag @timeaskitchen on Instagram and Facebook so I can share your rustic bakes.
Don't forget to pin this recipe to your favourite dessert board on Pinterest so you always have it on hand, and subscribe to our YouTube Channel for new step-by-step video recipes every week. Happy baking!
related
Looking for more homemade dessert inspiration? Try these favourites:

Authentic Basque Burnt Cheesecake (Ultra Creamy San Sebastián Recipe)
Equipment
- 1 stand mixer
- 1 springform cake pan
- 1 spatula
Ingredients
- 800 g cream cheese full-fat, room temperature
- 150 g sugar caster
- 5 pcs eggs free-range, room temperature
- 300 ml double cream heavy cream, room temperature
- 1 teaspoon vanilla essence
- 3 tablespoon flour plain wheat, or cornstarch for gluten-free
- ¼ teaspoon sea salt fine
Instructions
- Preheat the oven: Set your oven to 210°C Fan / 230°C Conventional (425°F - 450°F) with the rack positioned in the center.
- Line the tin: Lightly grease an 8-inch (20 cm) deep springform pan. Crumple two sheets of baking parchment, smooth them out, and press them into the tin overlapping each other, leaving at least a 2-inch (5 cm) collar above the rim.
- Beat cream cheese & sugar: In a large bowl, beat 800 g room-temperature cream cheese and 150 g caster sugar on low-medium speed for 2-3 minutes until completely smooth and lump-free.
- Add eggs: Beat in the 5 eggs one at a time on low speed, mixing just until incorporated before adding the next.
- Add liquids: Pour in 300 ml double cream, 1 teaspoon vanilla essence, and ¼ teaspoon sea salt. Mix on low for 30 seconds until combined.
- Sift flour: Sift 3 tablespoon plain flour over the batter. Gently fold in with a spatula or whisk on low speed until no dry pockets remain.
- Bake: Pour the batter into the prepared pan and tap the tin gently on the counter to release trapped air bubbles. Bake for 45-50 minutes until the top is deeply caramelized and dark brown, while the center 3-4 inches still wobbles like set jelly.
- Cool: Place on a wire rack to cool completely at room temperature for 3-4 hours. Serve at room temperature for a molten center, or chill in the fridge for 4 hours for a firmer custard slice.
Video
Notes
- Room Temperature Dairy: Cold cream cheese will result in lumps that cannot be beaten out without overworking the eggs.
- The Wobble: Never bake until the center is firm. Residual heat continues cooking the cheesecake while it rests.
- Storage: Store refrigerated in an airtight container for up to 5 days. Bring slices to room temperature 30 minutes before serving.
Nutrition
This post contains affiliate links. Read the full disclosure here.

Leave a Reply