
If you are looking for the ultimate sun pickles recipe that delivers a loud, satisfying crunch every single time, you are in the right place. Forget standard vinegar brines-these authentic, traditional sun pickles rely on the magic of old-school lacto-fermentation, kickstarted by a simple slice of bread and powered by the summer sun. In just three days, you will transform fresh, crisp garden cucumbers into perfectly tangy, garlicky, deli-style pickles that put store-bought jars to shame. Whether you grew up eating these traditional Hungarian-style pickles or are trying sun-fermentation for the very first time, this foolproof guide will show you exactly how to get that signature sour flavor without any complicated canning gear.

Jump to:
- What Are Sun Pickles? (The Science of the Bread Method)
- The Ingredients (And Why Every Choice Matters)
- How to Make the Sun Pickles Recipe? (Step-by-Step Guide)
- Top Tips for the Crispiest Sun Pickles
- Fun Recipe Variations & Flavor Twists
- How to Serve Traditional Sun Pickles
- How to Store Fermented Sun Pickles to Keep Them Crisp
- Frequently Asked Questions (Sun Pickles Troubleshooting)
- Join the Timea's Kitchen Community!
- Related
- Pairing
- Authentic Hungarian Sun Pickles Recipe (Kovászos Uborka)
What Are Sun Pickles? (The Science of the Bread Method)
Traditional Hungarian sun pickles (known as kovászos uborka) are entirely different from standard vinegar-brined pickles. Instead of using a boiling vinegar pour, this old-school method relies on natural lacto-fermentation.
By placing a fresh slice of bread at the top of the jar, you introduce carbohydrates and wild yeasts. Combined with the gentle warmth of the sun-fermentation process, beneficial Lactobacillus bacteria thrive. They consume the sugars, creating lactic acid which naturally preserves the cucumbers and gives them a deep, deli-style complexity.
There is a reason this traditional method has survived for generations-it is the ultimate summer kitchen hack:
- Ultimate Simplicity: It requires only a few basic ingredients. There is no complex canning equipment needed, and you don't even have to boil or sterilize the jars.
- Incredible Speed: Unlike traditional ferments that take weeks in a dark cellar, these are powered by the sun. With just three days of direct sunshine, your pickles are perfectly sour and ready to serve.
- Superior Flavour & Crunch: Natural fermentation creates a sharp, bubbly tang and a loud, satisfying crunch that vinegar-based quick pickles simply cannot compete with.
The Ingredients (And Why Every Choice Matters)
Making traditional sun pickles requires only a handful of ingredients, but because this is a live fermentation process, the quality and type of ingredients you choose will make or break your batch.
- 1. Pickling Cucumbers (Small to Medium)
- The Specifics: Look for firm, bumpy Kirby cucumbers or specific pickling varieties that are roughly 3 to 4 inches long.
- Why it matters: Large salad or English cucumbers have thin skins, large seed pockets, and too much water content, which causes them to turn to mush in the sun. Small, dense cucumbers ensure that iconic, loud crunch.
- 2. Dechlorinated or Filtered Water
- The Specifics: Use filtered water, spring water, or tap water that has been boiled and allowed to cool down to lukewarm.
- Why it matters: Standard tap water contains chlorine and chloramine, which are added by cities to kill bacteria. Unfortunately, they will also kill the beneficial Lactobacillus bacteria needed to ferment your pickles.
- 3. Non-Iodized Salt (Kosher Salt or Pure Sea Salt)
- The Specifics: Choose coarse Kosher salt, pickling salt, or pure sea salt. Avoid standard table salt at all costs.
- Why it matters: Regular table salt contains iodine and anti-caking agents. Iodine inhibits the growth of the wild yeasts, while anti-caking agents will turn your brine an unappealing grayish-black color instead of a healthy, milky cloudiness.
- 4. Fresh Flowering Dill
- The Specifics: A generous bunch of fresh dill. If you can find dill stalks with the yellow flower heads (dill crowns), use those-they contain the highest concentration of essential oils.
- Why it matters: Dried dill weed from the spice rack won't give you that bright, summer-fresh deli flavor.

- 5. Fresh Garlic Cloves
- The Specifics: Use 4 to 6 real, fresh garlic cloves. Peel them and give them a gentle smash with the flat side of your knife to release their aromatic oils.
- Why it matters: Avoid garlic powder or pre-minced jarred garlic from the store, which often contains preservatives that interfere with the ferment.
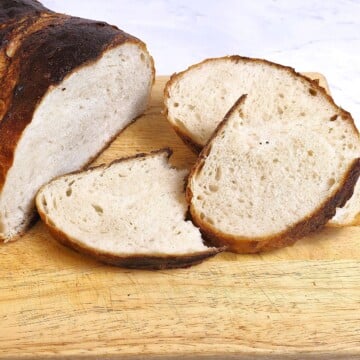
- 6. A Thick Slice of Bread
- The Specifics: A simple slice of white bread, crusty sourdough, or traditional rye bread.
- Why it matters: The bread acts as the engine for the fermentation. Its starches feed the wild bacteria and jumpstart the whole process.

- 7. Summer Savory / Csombor (Optional)
- The Specifics: A few fresh sprigs of summer savory (or winter savory). If you cannot find it fresh, a half-teaspoon of dried summer savory works too.
- Why it matters: This is the ultimate traditional Hungarian secret! While dill does the heavy lifting, a small amount of savory adds a subtle, earthy, peppery complexity that cuts through the salt and beautifully complements the fresh garlic.
💡 Quick Tip for Placement in the Jar:
When packing your jar, tuck the sprigs of summer savory right into the middle of the cucumbers, wedged against the glass. This ensures its essential oils distribute evenly throughout the brine as the sun warms the jar.
How to Make the Sun Pickles Recipe? (Step-by-Step Guide)
Ready to start fermenting? While the process is incredibly straightforward, seeing the exact placement of the herbs, how tightly to pack the jar, and how to balance the bread on top can make all the difference for beginners. Before diving into the written instructions below, watch this quick step-by-step video guide to see exactly how these traditional Hungarian summer pickles come together. It will give you a clear visual on what the brine should look like and how to set your jar up for success in the sun!
📺 Watch the Step-by-Step Video Tutorial:
Step 1: Prep the Cucumbers & Herbs
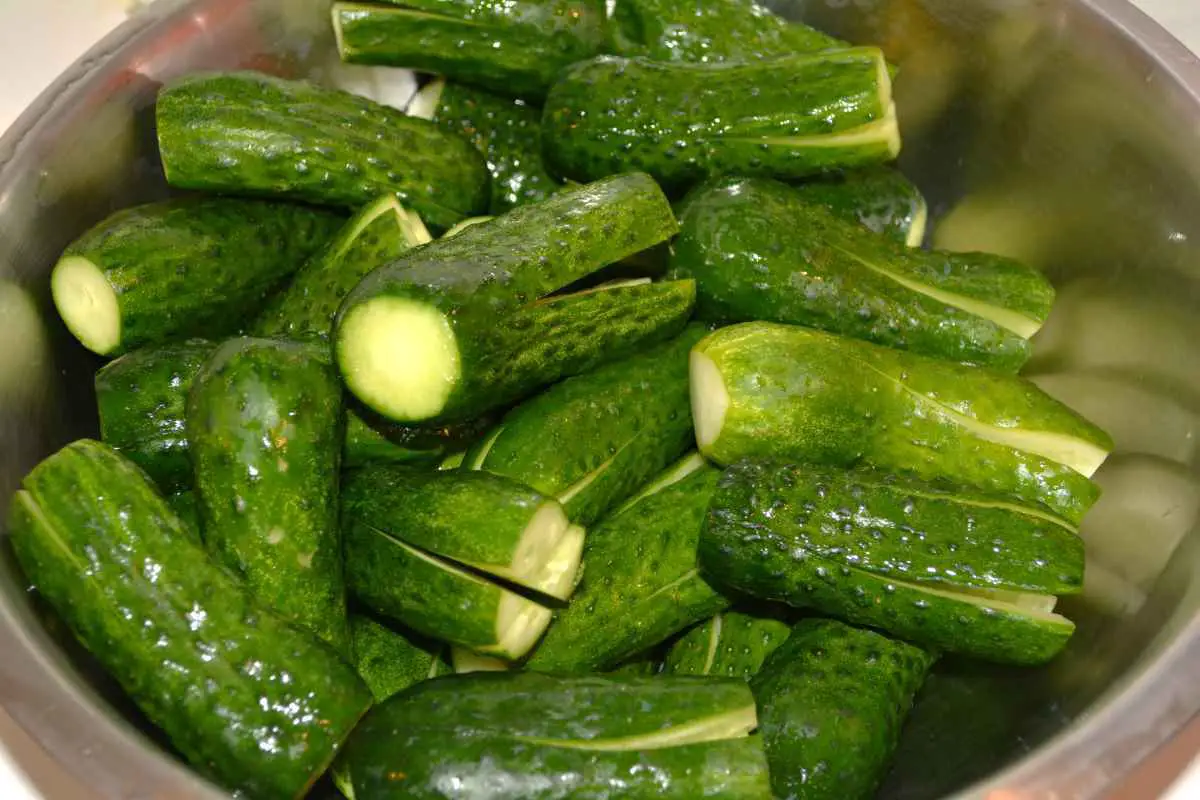
Wash your pickling cucumbers thoroughly in cold water to remove any dirt or grit. Using a sharp knife, slice a tiny 1/16-inch sliver off both the stem and blossom ends to ensure they stay perfectly crunchy. Next, cut a vertical slit down the center of each cucumber (leaving the ends intact)-this helps the flavorful brine penetrate the inside quickly. Peel your garlic cloves and gently smash them to release their aromatic oils.
Step 2: Pack the Jar
Grab two clean, wide-mouth 2-liter glass jars. Divide your fresh flowering dill, sprigs of summer savory, and smashed garlic cloves evenly between the two containers, placing them right at the bottom.

Pack the cucumbers tightly into both jars on top of the bed of herbs, standing them up vertically side-by-side (just like you see in the recipe images). Tuck any remaining garlic cloves into the open gaps between the cucumbers to ensure that rich flavor distributes evenly.

Step 3: Mix and Pour the Warm Brine
To ensure you have enough liquid to fill both 2-liter jars, scale up your brine mixture. In a large pitcher, stir 2 tablespoons of coarse non-iodized salt into 8 cups (2 liters) of lukewarm dechlorinated water until completely dissolved. Carefully divide and pour the saltwater brine into both jars, ensuring all the cucumbers are fully submerged under the liquid. Leave about an inch of headspace at the top of each jar.

Step 4: Add the Secret Engine (The Bread)
Place your remaining bunch of fresh dill right over the top of the cucumbers in both jars to act as a barrier. Next, take a thick slice of bread and place one slice right on top of the dill at the neck of each jar. The bread should be touching the brine so it can absorb the liquid and kickstart the wild yeast fermentation.

Step 5: Harness the Power of the Sun
Cover the tops of both jars loosely with a small saucer or a piece of cheesecloth secured with a rubber band (do not seal them airtight, as fermenting gasses need to escape). Place the jars outdoors in a sunny, warm spot-a sunny patio, balcony, or a bright south-facing windowsill works perfectly. Let the summer sun work its magic!

Step 6: The 48-Hour Bread Check & Storage
After exactly 48 hours, carefully remove and discard the slice of bread from each jar. By this time, your brine will look beautifully milky and cloudy. Let the pickles ferment in the sun for one more day (3 days total). Taste-test a pickle-if it's perfectly tangy and sour, strain the liquid to remove the loose dill and garlic, transfer the crunchy pickles back into the clean brine, and store the jars tightly sealed in the refrigerator.

Top Tips for the Crispiest Sun Pickles
Nothing ruins a batch of fermented pickles faster than a soft, soggy texture. If you want to know how to keep sun pickles crunchy every single time, follow these three non-negotiable rules before you start:
- Tip 1: Trim the Blossom End (Crucial!) - The blossom end (the tip opposite the stem) contains high concentrations of natural enzymes that break down pectin. If left intact, these enzymes will turn your cucumbers mushy. Always slice off a tiny 1/16-inch sliver from both ends to guarantee a loud crunch.
- Tip 2: Pick the Right Cucumber Variety - Skip the long English, Persian, or standard salad cucumbers. Their skins are too thin and their water content is too high. Choose firm, bumpy, fresh pickling cucumbers (like Kirbys) that can stand up to the warm fermentation process.
- Tip 3: Never Use Boiling Brine - When you pour your saltwater brine over the jars, it must be lukewarm or warm to the touch-never boiling hot. Scalding water will cook the cucumbers and instantly kill the live cultures in the bread needed to kickstart the fermentation.
Fun Recipe Variations & Flavor Twists
While the traditional Hungarian garlic-and-dill combination is an absolute classic, you can easily customize this sun pickles recipe to match your personal taste. Here are a few delicious variations to try in your next batch:
- Make it Spicy: If you love a kick, add 1 or 2 sliced jalapeños, a serrano pepper, or a teaspoon of red chili flakes to the bottom of the jars alongside the garlic. The warmth of the sun-fermentation will beautifully infuse the heat right into the center of the cucumbers.
- The Gluten-Free Swap (The Potato Trick): To make these pickles 100% gluten-free, you don't have to skip the recipe! Swap out the slice of bread for a peeled, thick slice of a raw potato or a slice of gluten-free bread. Just like regular bread, the starches in the potato provide the perfect fuel for the Lactobacillus bacteria to thrive.
- Add Extra Spices: For a deli-style flavor profile, toss in 1 teaspoon of whole black peppercorns, 1 teaspoon of mustard seeds, or a few coriander seeds into the jars.
- The Ultimate Crunch Booster (Tannin Leaves): If you are worried about your pickles losing their bite, tuck a clean grape leaf, oak leaf, or sour cherry leaf into the middle of the jars. These leaves are packed with natural tannins, which naturally prevent the cucumber cell walls from breaking down during fermentation.
How to Serve Traditional Sun Pickles
For the absolute best eating experience, always serve your traditional sun pickles thoroughly chilled straight from the refrigerator. Their bright, bubbly acidity and intense garlicky crunch make them the ultimate palate cleanser for heavy, rich, or smoky meals.
In Hungary, a summer meal is rarely served without a bowl of kovászos uborka on the table. They pair magnificently with classic comfort foods-try them alongside a steaming bowl of Hungarian hunter's stew, or use them to slice up next to a comforting batch of layered potatoes.
On a personal note, I especially love serving them with pan-fried rainbow trout or a platter of roasted vegetables. They provide a delicious crunch and a burst of fresh flavor that cuts through and complements richer dishes beautifully. They are also the perfect refreshing side dish for your casual summer backyard barbecues, sitting right alongside grilled meats, smoked brisket, and juicy burgers.

How to Store Fermented Sun Pickles to Keep Them Crisp
Once your pickles have spent their three days soaking up the sunshine, you must move them to cold storage. Cold temperatures slow down the active Lactobacillus bacteria, pausing the fermentation process so your pickles don't become over-sour or lose their bite.
Follow these simple steps for perfect storage:
- Clean up the brine: Remove and discard the spent dill stalks, garlic cloves, and any remaining bread crumbs floating in the jar.
- Strain (Optional): If you prefer a cleaner look, strain the cloudy brine through a fine-mesh sieve or cheesecloth to remove the sediment before pouring it back over the cucumbers.
- Submerge and Seal: Ensure the pickles are completely covered by the liquid so they don't dry out or mold. Seal the jars with a tight, airtight lid.
- Refrigerate: Pop the jars into the fridge.
Stored properly this way, your sun pickles will remain incredibly crisp, tangy, and delicious for up to 2 to 3 months!
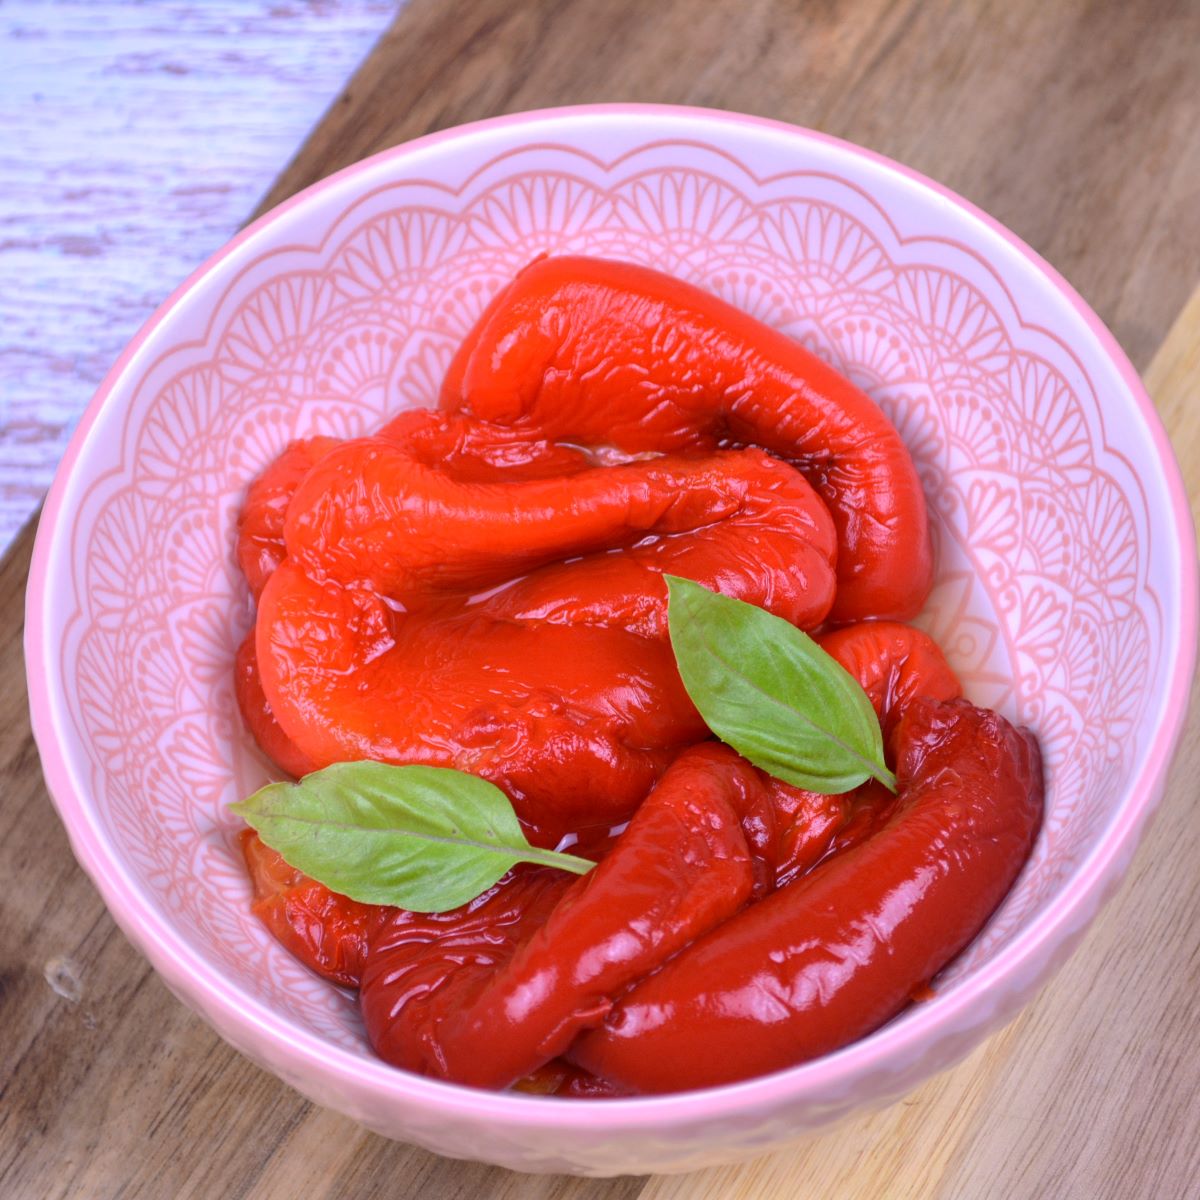
If you find yourself with an abundance of summer garden produce and love the art of easy home preservation, be sure to check out our step-by-step guide on Marinated Roasted Red Peppers to keep your pantry stocked all season long.
Frequently Asked Questions (Sun Pickles Troubleshooting)
A cloudy pickle brine is a completely normal and healthy sign of active lacto-fermentation. It indicates that the beneficial lactic acid bacteria are doing their job, consuming the sugars and creating that delicious sour flavor. If your brine stays perfectly clear after two days, fermentation likely hasn't started.
Sun pickles lose their crunch if the weather is too intensely hot (causing them to cook instead of ferment safely), if you didn't trim the blossom ends off the cucumbers, or if the cucumbers weren't perfectly fresh and firm when they went into the jar. Always cut a tiny 1/16-inch sliver off the tips to remove mush-causing enzymes.
A thin, dusty white film on the surface of the liquid is usually Kahm yeast. It is harmless and happens when the surface comes into contact with air. Simply skim it off with a clean spoon. However, if you see fuzzy, colorful patches (like green, black, or pink), that is mold, and the batch must be thrown out.
You must remove the slice of bread after 48 hours (two days) in the sun. Leaving it in the jar for the full duration won't make the pickles more sour-it will only dissolve into a messy sludge, ruin your brine clarity, and increase the risk of surface mold.
Once the 3-day sun-fermentation is complete, remove the garlic, dill, and any remaining bread particles, strain the brine, and store the jar in the refrigerator. Sealed tightly, your fermented sun pickles will remain crisp and delicious for up to 2 to 3 months.

Join the Timea's Kitchen Community!
Did you make this sun pickles recipe? There is nothing I love more than seeing how your recipes turn out in your own kitchens! If your jars are out soaking up the summer sun, let's stay connected:
- Leave a Comment & Rating Below: Did your pickles turn out as crunchy as promised? Drop a comment below and leave a star rating on the recipe card! Your feedback helps other readers find this recipe, and it means the world to me.
- Subscribe on YouTube: If you loved watching how these pickles come together, make sure to subscribe to the Timea's Kitchen YouTube Channel! Hit the notification bell so you never miss our step-by-step video recipes, authentic cooking tutorials, and seasonal kitchen inspiration.
- Snap a Picture for Instagram: Take a photo of your beautiful, cloudy jars basking in the sunshine and tag me @kitchentimea or use the hashtag #TimeasKitchen. I love resharing your fermenting successes in my stories!
- Pin it for Later on Pinterest: Don't lose this recipe! Click the Pin button to save this post to your favorite Summer Recipes or Fermentation & Pickling boards so you can make it every single year when cucumber season hits.
- Join the Conversation on Facebook: Follow the Timea's Kitchen Facebook Page for daily recipe inspiration, behind-the-scenes kitchen tips, and a community of fellow food lovers who appreciate authentic, scratch-made cooking.
Related
I highly recommend giving this sun pickles recipe a try - it's the perfect tangy and refreshing addition to any meal. If you're looking for more delicious side dish inspiration, check out these favourites from the blog:


Pairing
These sun pickles with bread are incredibly versatile! Here are a few of my favourite recipes that they complement perfectly:


Authentic Hungarian Sun Pickles Recipe (Kovászos Uborka)
Equipment
- 2 jars 2 litres volume
Ingredients
- 2 kg pickling cucumbers small-to-medium Kirbys work best
- 1 bunch fresh dill ideally with dill crowns
- 6 pieces garlic cloves peeled and gently smashed
- 2 slices bread Sourdough, or Rye Bread
- 2+½ tablespoon sea salt Kosher salt or pure sea salt
- 2 l water Dechlorinated or Filtered Water
- 4 sprigs fresh summer savory Optional, traditional Hungarian csombor
Instructions
- Prep the Cucumbers-Wash the pickling cucumbers thoroughly in cold water to remove any dirt. Using a sharp knife, slice a tiny 1/16-inch sliver off both the stem and blossom ends to prevent mushiness. Cut a vertical slit down the center of each cucumber, keeping the ends intact, so the brine can easily penetrate.
- Pack the Jars-Take your two clean 2-liter wide-mouth glass jars. Divide half of the fresh dill, the summer savory sprigs, and half of the smashed garlic cloves evenly between the bottoms of both jars. Pack the cucumbers tightly into the jars on top of the herbs, standing them up vertically side-by-side. Tuck the remaining garlic cloves into the gaps between the cucumbers.
- Prepare and Pour the Brine-In a large pitcher, stir 2 tablespoons of coarse non-iodized salt into 8 cups (2 liters) of lukewarm filtered water until the salt completely dissolves. Divide and pour the warm brine into both jars, making sure all the cucumbers are fully submerged. Leave about 1 inch of headspace at the top of each jar.
- Add the Dill Barrier and Bread-Place the remaining fresh dill over the top of the cucumbers in both jars to act as a protective layer. Position one thick slice of bread right on top of the dill at the neck of each jar, pressing down slightly so the bread absorbs the brine and begins to kickstart the fermentation.
- Place in the Sun-Cover the top of each jar loosely with a small ceramic saucer or a piece of cheesecloth secured with a rubber band. Do not seal the jars airtight, as gases need to escape. Place both jars outdoors in a warm, sunny spot (like a patio or balcony) or on a bright, south-facing windowsill to ferment.
- Discard Bread and Chill-After exactly 48 hours, carefully remove and discard the soggy slices of bread from both jars. Let the jars sit in the sun for one final day (3 days total fermentation time). Once the brine is milky and the pickles taste perfectly sour, strain the liquid, discard the spent herbs, return the pickles to the clean brine, seal tightly, and store in the refrigerator.
Video
Notes
- The Crucial Crunch Rule: Always slice off a tiny $1/16$-inch sliver from the blossom end of each cucumber before packing. The blossom end contains natural enzymes that will break down the pectin and make your pickles mushy in the sun.
- Brine Temperature: Ensure your saltwater brine is lukewarm or comfortably warm to the touch before pouring it over the cucumbers. If the water is boiling hot, it will cook the cucumbers and kill the live yeast cultures in the bread.
- The 48-Hour Bread Rule: Do not leave the bread in the jars for the entire 3 days. Remove and discard the bread slices after exactly 48 hours. This keeps your brine from becoming messy and reduces the risk of surface mold.
- Gluten-Free Alternative: To make this recipe gluten-free, simply replace the slice of bread in each jar with a thick, peeled slice of raw potato. The natural starches in the potato will fuel the fermentation beautifully.
- Storage: Once fermentation is complete on day 3, strain the brine, remove the spent dill/garlic, and store the jars tightly sealed in the refrigerator. They will stay crisp and sour for up to 2 to 3 months.
Nutrition
This post contains affiliate links. Read the full disclosure here.

Leave a Reply