
Imagine a rich, smooth cheesecake that practically makes itself - no baking, no crust, and absolutely delicious. That's exactly what you'll get with our No-Bake Crustless Cheesecake! If you've been searching for a simple yet elegant dessert that comes together in a flash, your quest ends here. This recipe is designed for ease and maximum enjoyment, letting you spend less time cooking and more time savoring every delightful bite. Ready to simplify your dessert game?

While cheesecake is a beloved dessert year-round, its no-bake nature makes this particular version a fantastic choice for spring or summer days when you want a refreshing treat without heating up the kitchen. It's light, vibrant, and effortlessly elegant, fitting perfectly into family dinners.
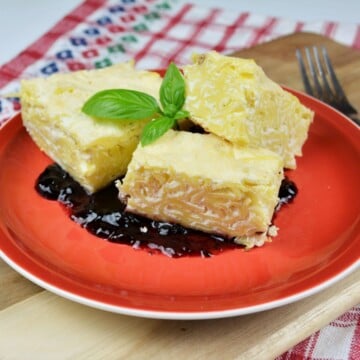
This delightful No-Bake Crustless Cheesecake actually draws its inspiration from another one of our reader favorites: my best raspberry cheesecake recipe. I wanted to create something equally indulgent but even simpler, focusing on fresh flavors and a smooth, rich texture without the need for an oven.
Jump to:
And what pairs perfectly with a sweet and tangy dessert like this? For a truly memorable meal, serve this cheesecake after a delightful grilled apricot salad. The contrasting flavors and textures create a beautifully balanced dining experience that will leave everyone satisfied.
Ingredients
Ready to create some magic? This no-bake cheesecake comes together with a handful of accessible ingredients, most of which you might already have in your pantry or can easily find at your local grocery store. We'll be using quality components to ensure every spoonful of this No-Bake Crustless Cheesecake is absolutely delicious. Let's take a look at what you'll need:
First Layer
- 200 g Unsalted Butter: We're using unsalted butter to control the overall saltiness of the cheesecake. Make sure it's at room temperature for easy blending!
- 250 g Granulated Sugar: This sweetens our cheesecake beautifully, balancing the tang of the cheese and the richness of the butter.
- 1 tablespoon Vanilla Sugar (or Vanilla Extract): Adds a lovely aromatic depth to the cheesecake. If you don't have vanilla sugar, a teaspoon or two of good quality vanilla extract will work perfectly.
- Pinch of Salt: Just a tiny bit enhances all the other flavors, bringing out the sweetness and richness.
- 4 Egg Yolks: The yolks contribute to the cheesecake's luscious, smooth texture and rich color, helping to emulsify the mixture.
- 500 g Cottage Cheese (or Curd Cheese): This is the star of our cheesecake! Opt for a good quality, full-fat cottage cheese for the best creamy consistency.
- 12 g Gelatine: Gelatine helps set the cheesecake and the fruit topping, giving it that perfect sliceable structure without needing to bake.
- 2 tablespoon Water (cold, for base gelatine): Used to bloom and dissolve the gelatine before adding it to the mixtures.
- 100 ml Hot Milk: Helps fully dissolve the gelatine into a smooth liquid, ensuring it incorporates seamlessly into the cheese mixture.

Second Layer
- 500 ml Water (for topping gelatine): Used to dissolve the gelatine for the fruit topping.
- 12 g Gelatine (for the topping): The secret to our no-bake success!
- 2 tablespoon Pomegranate Syrup: This gives our top layer its beautiful color and a unique sweet-tart flavor that complements the fruit perfectly.
- 200 g Canned Peach: Sweet, soft, and convenient, canned peaches add a wonderful fruity layer and texture to the top of the cheesecake. Drain them well before using!
- 200 g Canned Sour Cherry: These provide a fantastic tart contrast to the sweet cheesecake and peaches, adding another burst of fruity flavor and a pop of color. Like the peaches, ensure they are well-drained.
How to Make the No Bake Crustless Cheesecake?
Now for the fun part - putting it all together! You'll be amazed at how simple it is to create this stunning dessert without turning on your oven. For a step-by-step visual guide, be sure to watch our full No-Bake Crustless Cheesecake video recipe here:
Otherwise, follow along with the written instructions below.
Prepare the Cottage Cheese Mixture
Step 1: Cream the Base Ingredients
In a large glass bowl, combine the unsalted butter (make sure it's at room temperature!), granulated sugar, vanilla sugar, and a pinch of salt. Using an electric mixer, beat these ingredients together until they are well incorporated and the mixture is light and creamy.

Step 2: Incorporate the Egg Yolks
Next, add the 4 egg yolks to the butter and sugar mixture. Continue mixing with your electric mixer until the egg yolks are fully incorporated, and the mixture is smooth and evenly colored.

Step 3: Add the Cottage Cheese
Now, add the cottage cheese to the bowl. Continue mixing with your electric mixer until the cottage cheese is fully incorporated into the butter and egg yolk mixture, resulting in a smooth and uniform cheesecake base.

Step 4: Prepare the Gelatine Mixture for the Base
In a small, separate bowl, dissolve 12 g of gelatine in cold water. Stir well until the gelatine is fully hydrated. Then, add the hot milk to the gelatine mixture and mix again vigorously until the gelatine is completely dissolved and no lumps remain. This ensures a smooth set for your cheesecake!

Step 5: Combine and Chill the Cheesecake Base
Pour the prepared gelatine and hot milk mixture directly into your large bowl with the cheese mixture. Mix thoroughly with your electric mixer until everything is completely combined and smooth.

Once mixed, carefully transfer this entire cheese mixture into a springform pan (lightly grease it first if desired, though often not strictly necessary for a no-bake). Smooth the top with a spatula if needed, then place the springform pan into the fridge to chill for at least one hour.
This initial chill time is crucial for the base to set before the topping is added.

Make the Jelly for the Top
While your cheesecake base is chilling, prepare the vibrant fruit jelly topping. In a saucepan, bring 500 ml of water to a boil. Turn off the heat immediately and add 12 g of gelatine. Whisk continuously until the gelatine is completely dissolved. Then, stir in the pomegranate syrup until well combined. Set this mixture aside and allow it to cool down to room temperature. It's important that it's cool, but still liquid, before you pour it over the cheesecake.

Make the Second Layer of the Cake
Once your cheesecake base has chilled for at least an hour and the jelly mixture has cooled, carefully take the springform pan out of the fridge. Evenly arrange the drained canned peaches and the drained canned sour cherries over the set cheese mixture. You can arrange them in a decorative pattern or simply scatter them; either way, they'll add beautiful color and flavor!

Finally, carefully pour the cooled gelatine and pomegranate syrup mixture evenly over the arranged fruit and the cheesecake base. Once poured, gently return the springform pan to the fridge. This last chilling period is the most important: allow the cheesecake to set completely, ideally overnight, to ensure the jelly is firm and the cheesecake is perfectly sliceable.

And there you have it! A truly effortless and incredibly delicious No-Bake Crustless Cheesecake that's ready to impress. You just created a beautiful, rich, and creamy dessert with vibrant fruit, all without ever turning on your oven. Enjoy every delightful slice!
Delicious Variations to Try
Once you've mastered the classic version of this No-Bake Crustless Cheesecake, the possibilities for customization are endless! Here are some creative ways to switch up the flavors and textures:
Fruit Fantasies
- Mixed Berry Delight: Instead of peaches and sour cherries, top with a medley of fresh or frozen (thawed and drained) strawberries, blueberries, raspberries, and blackberries. For the jelly, you could use a berry-flavored syrup or even a fruit juice like cranberry or cherry.
- Tropical Escape: Use drained canned pineapple chunks or sliced mango. For the jelly, a passion fruit syrup or orange juice would create a sunny, tropical vibe.
- Zesty Citrus Topping: Arrange thin slices of mandarin oranges or grapefruit segments on top, and for the jelly, use an orange or lemon-flavored gelatin or syrup.
Cheesecake Base Flavor Boosts
- Lemon Zest Zing: Add the zest of one or two lemons to the cheese mixture along with the vanilla sugar for a bright, tangy kick.
- Chocolate Lover's Dream: Whisk in 2-3 tablespoons of unsweetened cocoa powder to the cheese mixture for a subtle chocolate cheesecake base. You could even swirl in a tablespoon of Nutella for a marbled effect.
- Almond Infusion: Replace vanilla sugar with almond extract (use a smaller quantity, usually ½ to 1 teaspoon) for a delicate nutty flavor.
- Coffee Kiss: Dissolve 1-2 teaspoons of instant espresso powder in the hot milk before adding it to the cheese mixture for a subtle coffee-flavored cheesecake.
Serving the Cheesecake
After patiently chilling overnight, your stunning No-Bake Crustless Cheesecake is ready for its grand debut! Serving this beauty is surprisingly simple, ensuring that every slice looks as magnificent as it tastes.
To achieve those perfectly clean, Instagram-worthy slices, use a sharp knife, dipping it in hot water and wiping it clean between each cut. This simple trick ensures the knife glides smoothly through the fruit jelly and creamy base, preventing any dragging or tearing.
While this cheesecake is undoubtedly a showstopper all on its own, a few simple garnishes can elevate it even further:
- Fresh Fruit: A scattering of fresh berries (like vibrant raspberries or plump blueberries) or a few extra slices of the canned fruit used in the recipe adds a lovely pop of color and a touch of freshness.
- Mint Sprig: A tiny sprig of fresh mint placed artfully beside each slice offers an elegant finish and a subtle aromatic hint.
- Whipped Cream: For an extra touch of indulgence, pipe or dollop some freshly whipped cream alongside each serving.
- Chocolate Shavings: If you're a chocolate lover, a light dusting of white or dark chocolate shavings can add a decadent flourish.

Prepare to impress your guests (or simply yourself!) with this easy-to-make, exquisite dessert. Enjoy every luscious bite!
How to Store the Crustless Cheesecake
One of the best things about this no-bake cheesecake (besides how easy it is to make!) is how well it stores, meaning you can enjoy slices for days to come or even prepare it ahead of time for special occasions.
Your cheesecake must be stored in the refrigerator due to its dairy and gelatin content. For optimal freshness and to prevent it from absorbing any odors from your fridge, cover it tightly.
Properly stored in the refrigerator, this No-Bake Crustless Cheesecake will remain fresh and delicious for 3-4 days.

Top Tips for No-Bake Cheesecake Success
To ensure your No-Bake Crustless Cheesecake turns out perfectly every time, keep these expert tips in mind:
- Mind Your Gelatine: The success of this no-bake recipe hinges on properly dissolving your gelatine. Ensure you follow the instructions for blooming it in cold water first, then dissolving it completely in hot liquid. Any undissolved bits can lead to a lumpy texture or a cake that doesn't set properly.
- Room Temperature Butter is Key: Starting with room temperature butter for the base mixture is crucial. It creams smoothly with the sugar and egg yolks, leading to a consistently smooth and lump-free cheesecake batter.
- Drain Your Fruit Well: Whether using canned peaches or sour cherries, make sure to drain them thoroughly. Excess liquid from the fruit can seep into your cheesecake base or dilute the jelly topping, potentially affecting its set and flavor.
- Patience is a Virtue (Especially for Chilling!): While the initial hour in the fridge is good, the overnight chill is non-negotiable for the final set. Don't rush this step! A fully chilled cheesecake will be firm, easy to slice, and have the perfect texture.
- Springform Pan is Your Friend: A springform pan makes releasing this crustless cheesecake a breeze. Ensure it's latched securely before pouring in your mixture.
More Sweet Treats You'll Love!
Enjoyed making this No-Bake Crustless Cheesecake? We've got a whole collection of delightful desserts waiting for you on Timea's Kitchen! If you're looking for more ways to satisfy your sweet tooth, check out some of our other popular recipes:
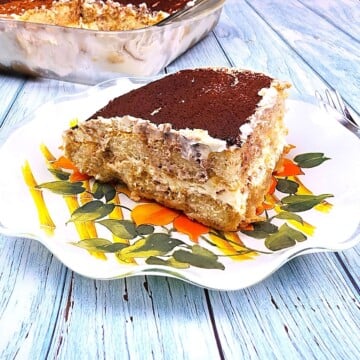
- The Best Russian Cheesecake: Dive into another incredible cheesecake experience.
- Apple Shortcrust Pastry Recipe: A classic, comforting treat perfect for any occasion.
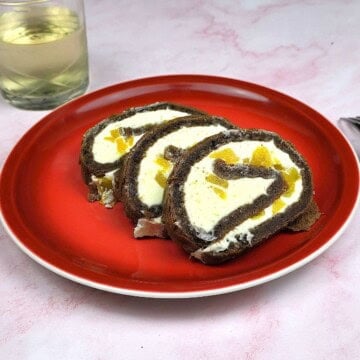
- Chocolate Biscuit Roll: An easy, no-bake favorite for chocolate lovers.
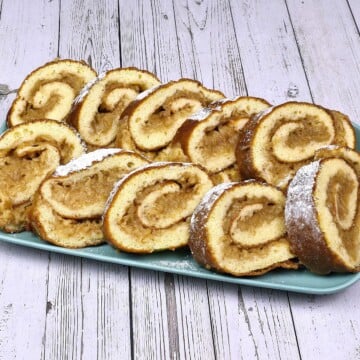
- Upside Down Orange Cake: A vibrant and zesty cake that's sure to impress.
Happy baking (and no-baking)! We love seeing what you create, so don't forget to share your photos and tag us on social media!
FAQ
The most common culprit for a no-bake cheesecake that doesn't set is an issue with the gelatin. Ensure your gelatin is properly dissolved in both the cold water (to bloom) and then the hot milk/water. Any undissolved granules will prevent a firm set. Also, make sure you've given it ample chilling time - ideally overnight in the fridge - as rushing this step will result in a softer consistency.
Absolutely! Fresh fruit like sliced strawberries, raspberries, blueberries, or mango can be wonderful. However, keep in mind that some fresh fruits, particularly pineapple, kiwi, and papaya, contain enzymes that can prevent gelatin from setting. If using these, it's best to briefly blanch or cook them first to deactivate the enzymes, or simply stick to gelatin-friendly fresh fruits. Always drain canned fruit well to avoid excess moisture.
There you have it! A truly effortless and incredibly delicious No-Bake Crustless Cheesecake that's ready to impress. You just created a beautiful, rich, and creamy dessert with vibrant fruit, all without ever turning on your oven. We hope you love making and sharing this recipe as much as we do!
Don't forget to connect with us and share your culinary creations. You can find us on Facebook, Instagram, Pinterest, and YouTube for more easy recipes, tips, and inspiration. We can't wait to see what you bake next!
Related
Looking for other cheese dessert recipes like this? Try these:


No-Bake Crustless Cheesecake: Easy & Delicious Recipe
Equipment
- 1 mixing bowl
- 1 Saucepan
- 1 springform cake pan
Ingredients
- 200 g butter unsalted
- 250 g sugar granulated
- 1 tablespoon vanilla sugar one sachet
- ¼ teaspoon salt one pinch
- 4 pcs egg yolks from free-range eggs
- 500 g cottage cheese or curd cheese
- 10 g gelatine powder one sachet
- 2 tablespoon water cold
- 100 ml milk hot
- 200 g peach canned
- 200 g sour cherry canned
- 500 ml water boiling
- 10 g gelatine powder one sachet
- 2 tablespoon pomegranate syrup
Instructions
- In a large bowl, combine the unsalted butter, granulated sugar, vanilla sugar, and a pinch of salt. Using an electric mixer, beat these ingredients together until they are well incorporated and the mixture is light and creamy.
- Add the egg yolks to the butter and sugar mixture and continue mixing until the egg yolks are fully incorporated.
- Now, add the cottage cheese to the bowl and continue mixing resulting in a smooth and uniform cheesecake base.
- Dissolve 10 g of gelatine in cold water. Stir well until the gelatine is fully hydrated. Then, add the hot milk to the gelatine mixture and mix again vigorously until the gelatine is completely dissolved and no lumps remain.
- Pour the prepared gelatine mixture over the cheese mixture. Mix thoroughly with your electric mixer until everything is completely combined and smooth.
- Transfer this entire cheese mixture into a springform pan then place it into the fridge to chill for at least one hour.
- In a saucepan, bring 500 ml of water to a boil. Turn off the heat immediately and add a sachet of gelatine. Whisk continuously until the gelatine is completely dissolved. Then, stir in the pomegranate syrup until well combined. Set this mixture aside and allow it to cool down to room temperature.
- Take the springform pan out of the fridge and evenly arrange the drained canned peaches and sour cherries over the set cheese mixture.
- Pour the cooled gelatine mixture evenly over the arranged fruit and the cheesecake base. Return the springform pan to the fridge and allow the cheesecake to set completely, ideally overnight.
Video
Notes
Nutrition
This post contains affiliate links. Read the full disclosure here.

Laci says
Easy no-bake recipe.