
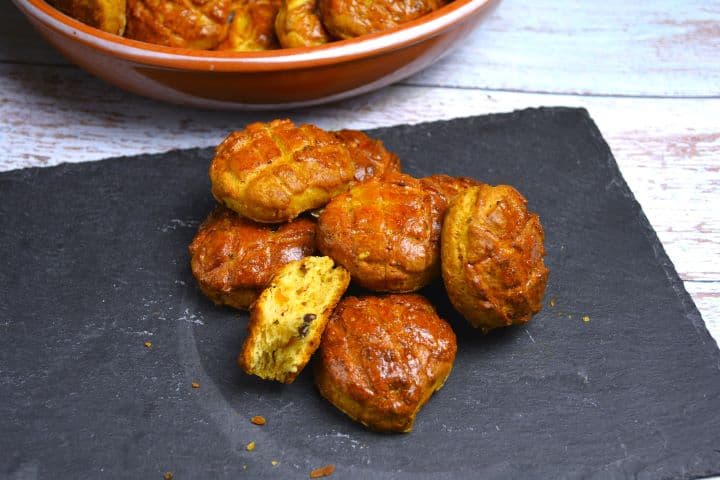
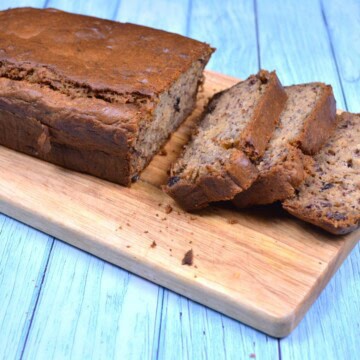
There is a specific, savory aroma that defines a Hungarian kitchen: the scent of Hungarian Crackling Scones (Tepertős Pogácsa) fresh out of the oven.
If you've never had a traditional pogácsa, you are in for a treat. Unlike the sweet scones you might find at an afternoon tea, these are deeply savory, salty, and incredibly flaky. They are the ultimate "comfort snack"-the kind of food that appears at every Hungarian family gathering, wine tasting, or holiday celebration.

While you can find Hungarian Crackling Scones in bakeries year-round, they hold a special place during the colder months. Traditionally, winter was the time for the disznóvágás (traditional pig slaughter) in Hungarian villages. This was when fresh cracklings were most abundant, making it the peak season for baking Tepertős Pogácsa.
Today, they are the "official" welcome snack of Hungary. Whether it's a New Year's Eve party, a wedding, or a simple Sunday family gathering, a basket of warm scones is always on the table. They are also the traditional snack given to graduates (ballagás) to carry in their small satchels as they leave school.
Jump to:
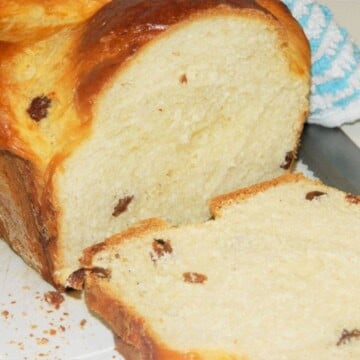
This recipe was actually inspired by my love for traditional dough techniques, much like my Perfect Yeast Doughnuts recipe. If you enjoyed the process of working with yeast dough for these scones, you'll find the same satisfaction in mastering the perfect swirl in a poppy seed or walnut roll.
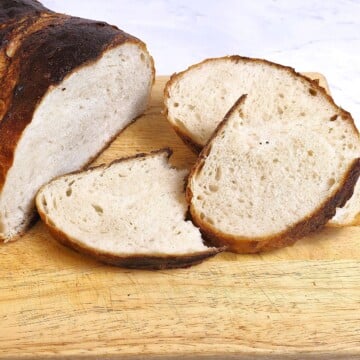
When it comes to serving, Hungarian Crackling Scones are the perfect partner for heavy, rustic dishes. They are traditionally served alongside a steaming bowl of Traditional Hungarian Goulash soup
or a rich White Bean Soup with Smoked Ribs. The saltiness of the scones cuts through the richness of the soup perfectly, making for a complete, soul-warming meal.
What You'll Need for Authentic Pogácsa
One of the beautiful things about Hungarian Crackling Scones is that they rely on humble, pantry-staple ingredients. However, the quality of these ingredients-especially the fats-makes all the difference in the final flavor and texture. Here is what you need to gather before you start:
- 500g All-Purpose Flour: This provides the essential structure for our dough.
- 7g Dried Yeast: One standard sachet to give the scones their signature lift and airy interior.
- 180g Whole Pork Cracklings (Tepertő): Choose high-quality, crunchy cracklings. We will be grinding these into a savory paste to create those famous layers.
- 1 tablespoon Pork Lard: This is the secret to a truly authentic texture. Lard makes the dough incredibly short and flaky in a way that butter simply can't match.
- 300ml Sour Cream: A staple in Hungarian baking, sour cream adds fat and acidity, resulting in a tender, pillow-soft crumb.
- 1 Whole Egg + 1 Egg Yolk: The extra yolk brings richness and a beautiful color to the dough.
- 1 tablespoon Salt: Don't be shy with the salt! Pogácsa is meant to be a savory, salty snack.
- 1.5 teaspoon Ground Black Pepper: This provides a subtle kick that cuts through the richness of the pork.
- 1 Egg (for the top): You'll need one additional egg, lightly beaten, to brush over the scones before they hit the oven for that perfect golden shine.

A Quick Note on the Cracklings
When shopping for your whole pork cracklings (pork greaves or pork rinds), look for pieces that look golden and crisp. If they have a little bit of rendered fat still attached, that's even better-it will make the grinding process easier and the final scones even more flavorful!
How to Make the Hungarian Crackling Scones
Mastering the perfect Hungarian Crackling Scones is all about the process. While the dough itself is simple to put together, the magic happens during the grinding and folding stages. This "lamination" technique is what creates those sky-high, flaky layers that pull apart so satisfyingly. If you are a visual learner, I highly recommend watching my step-by-step video tutorial below to see exactly how to handle the dough and master the folding technique.
Step 1: Preparing the Savory Crackling Paste
The foundation of the flavor and the "lamination" (layering) in this recipe is the crackling paste. Instead of using store-bought spread, we are making it from scratch to ensure a rich, authentic taste.
Place your 180g of whole pork cracklings into an electric chopper or food processor.
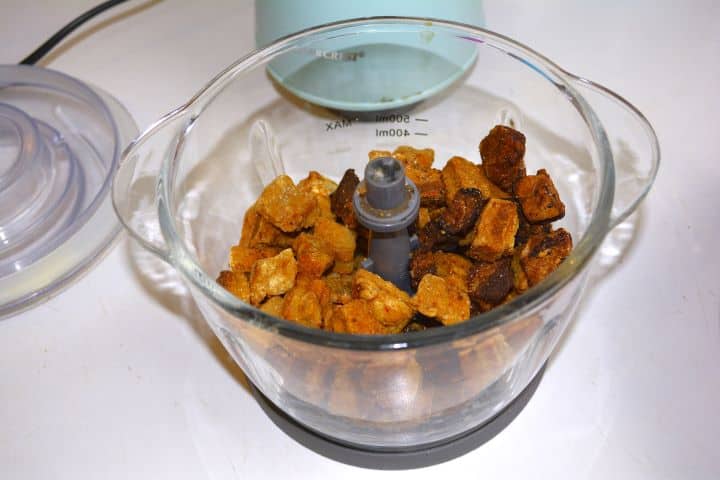
Pulse and blend until the cracklings are completely broken down into a fine, spreadable paste. Depending on how crispy your cracklings are, this might take a minute or two.

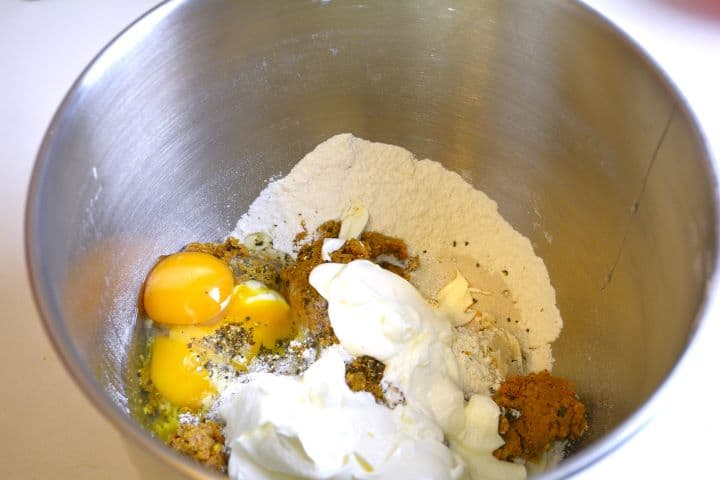
Step 2: Mixing and Kneading the Dough
In the bowl of your electric stand mixer, add the 500g flour, 1 tablespoon salt, 1.5 teaspoon ground pepper, 1 tablespoon pork lard, 1 whole egg, 1 egg yolk, 300ml sour cream, the 7g of dried yeast (you can add it directly to the flour), and finally, your prepared crackling paste.
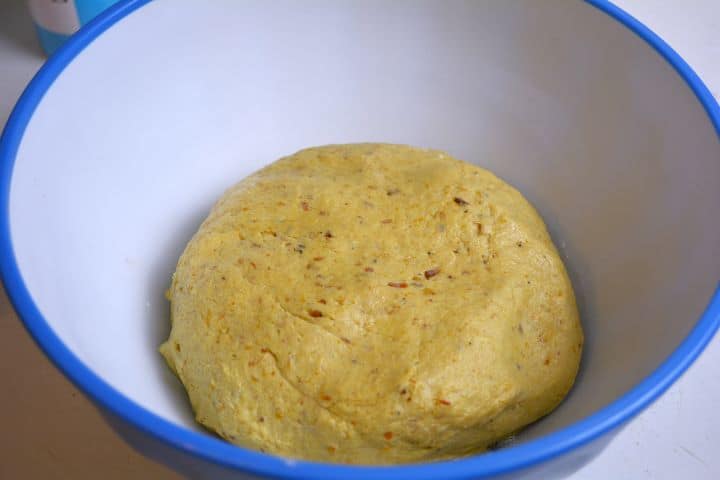
Start your mixer on a low-to-medium speed using the dough hook attachment. Knead the mixture until all ingredients are fully incorporated. You will know the dough is ready when it becomes smooth and elastic, and completely stops sticking to the sides of the bowl.

Transfer the dough into a separate, lightly greased bowl. Cover it with a clean kitchen towel and let it rest for 30 minutes. This short rest allows the gluten to relax and the flavors to begin melding together.
Step 3: The Lamination (Folding) Process
To get those sky-high, pull-apart layers, we need to treat the dough a bit like a pastry. By folding it multiple times, we are layering the gluten and the fats, which will expand in the oven.
- The First Roll: After the 30-minute rest, turn the dough out onto a lightly floured surface. Roll it out into a large rectangle, approximately 1cm (about ½ inch) thick.
- The "Letter" Fold: * Fold the top third of the dough down to the center.
- Fold the bottom third up over the top (like you are folding a letter for an envelope).
- Now, fold the left side to the middle, and the right side over that. You should have a thick, neat square of dough.
- The Rest & Repeat: Cover the dough and let it rest for another 20-30 minutes.
- The Three-Fold Rule: For the best results, repeat this rolling and folding process three times in total, resting the dough for 20-30 minutes between each set.
- Timea's Tip: Don't skip the rests! This allows the gluten to relax so you can roll it out easily without the dough "shrinking" back.
Step 4: Scoring and Cutting
Once the final folding and resting are complete, it's time to give the scones their iconic look.
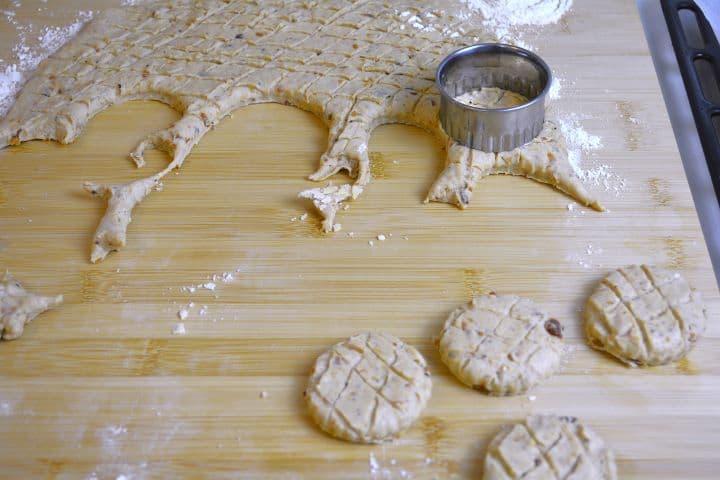
Roll the dough out one last time to a thickness of about 2-2.5 cm (around 1 inch). You want them to be thick so they can rise tall!

Using a sharp knife, gently score the top of the dough in a diagonal cross-hatch (diamond) pattern. Don't cut too deep-just enough to mark the surface. This helps the scones rise straight up and looks beautiful.

Use a round biscuit cutter (approx. 5cm in diameter) to cut out the scones.
Pro Tip: Push the cutter straight down and pull it straight up-do not twist it! Twisting "seals" the edges and prevents those beautiful layers from opening up.
Step 5: Baking to Perfection
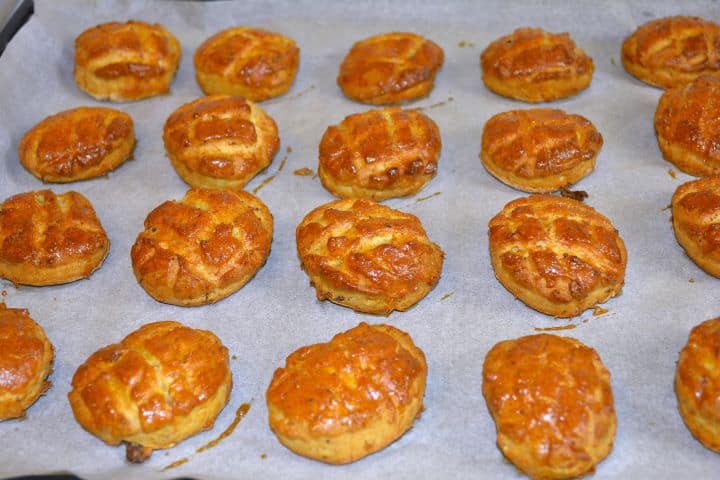
Place them on a baking tray lined with parchment paper. Brush the tops generously with your beaten egg, being careful not to let the egg drip down the sides (which can also stick the layers together). Let them rest on the tray for a final 20 minutes while you preheat the oven.

Set your oven to 180°C (350°F) Fan. If you don't have a fan-assisted oven, you may need to increase the temperature to 200°C. Slide the tray into the center of the oven and bake for 15-18 minutes.
You are looking for a beautiful, deep golden brown color on the top and a visible rise in those laminated layers.
There you have it-the secret to making world-class Hungarian Crackling Scones right in your own kitchen. While they take a little bit of patience with the folding and resting, the first bite into those savory, peppery layers makes it all worth it.
Variations
While the classic Tepertős Pogácsa is a masterpiece on its own, Hungarian cuisine often plays with different flavors and textures. Here are a few popular ways to put a twist on this recipe:
- 1. The Cheese Topping (Sajtos)- This is the most popular variation. Before baking, after brushing with the egg wash, sprinkle a generous amount of grated cheese on top. A sharp cheese like Gouda, Emmental, or even a strong Cheddar works beautifully. The cheese melts into the scored top, creating a crispy, savory crust.
- 2. Wild Garlic (Medvehagymás)- In Hungary, spring is the season for Medvehagyma (wild garlic). It is very common to add finely chopped wild garlic leaves into the dough during the folding process. This gives the scones a vibrant green speckle and a wonderful, mild garlic aroma that pairs perfectly with the rich cracklings.
- 3. Spicy Hungarian Twist- If you like a bit of heat, add a teaspoon of Hungarian smoked paprika (sweet or hot) to the dough along with the black pepper. This gives the scones a beautiful reddish hue and a deep, smoky flavor that complements the pork lard.
- 4. Seeded Toppings- For extra crunch and a traditional bakery look, you can sprinkle the tops with:
- Caraway seeds: Very traditional in Hungary and helps with digestion.
- Sesame seeds: Adds a nutty flavor.
- Nigella seeds: For a slightly onion-like, aromatic finish.
Serving
In Hungary, Tepertős Pogácsa is more than just a snack-it's a social essential. Because they are savory, rich, and "sturdy," they are the perfect accompaniment to both formal meals and casual get-togethers.
Here are the best ways to serve your Hungarian Crackling Scones:
- 1. The Traditional Way: With Hearty Soups- This is the most iconic way to enjoy them. In Hungary, a thick, meat-heavy soup is often served as the main course, and these scones take the place of bread. Pair them with: Goulash Soup, Hungarian Bean Soup, or a smoked sausage potato soup.
- 2. The Social Way: Wine and Beer Tastings- If you visit a wine cellar in the Tokaj or Eger regions of Hungary, you will almost certainly be served a basket of pogácsa.
- Wine Pairing: They pair beautifully with a dry red wine (like Egri Bikavér) or a crisp white wine.
- Beer Pairing: The saltiness and the pork fat make them a match made in heaven for a cold lager or pilsner.
- Pálinka: They are often served alongside a glass of fruit brandy (Pálinka) to help balance the strong spirit.
- 3. The Party Appetizer- Because these scones are small and don't require any dipping sauce or toppings, they are the ultimate "clean" finger food.
- Display: Pile them high in a linen-lined wicker basket.
- Occasions: Serve them at New Year's Eve parties, weddings, or family gatherings. They are best at room temperature or slightly warmed.
- 4. Afternoon "Savory" Tea- While the British have sweet scones with jam, Hungarians have pogácsa. Serve them in the afternoon with a cup of strong black tea or coffee for a satisfying savory pick-me-up.
Storage
Since these scones are quite rich in fat (thanks to the cracklings and lard), they actually stay fresh longer than standard bread. However, to keep that "just-baked" flakiness, you need to store them properly.
Here is everything you need to know about keeping your Hungarian Crackling Scones fresh or prepping them in advance.
- Storing at Room Temperature- Once the scones have cooled completely, place them in an airtight container or a bread box.
- Shelf Life: They will stay soft and delicious for 3-4 days.
- Tip: Do not store them in the fridge! The cold temperature actually makes the starches in the flour crystallize faster, which will make your scones go stale and tough.
- How to Freeze (Baked)- If you've made a large batch, these scones freeze beautifully.
- To Freeze: Allow the scones to cool completely. Place them in a single layer on a tray and put them in the freezer for an hour (this is called "flash freezing" so they don't stick together). Once firm, transfer them to a freezer-safe bag.
- Storage Time: They will stay fresh in the freezer for up to 3 months.
- To Thaw: Let them sit at room temperature for an hour, or overnight in the freezer bag.
- Freezing Unbaked Scones (The "Bake-on-Demand" Method)- You can also freeze the cut, unbaked scones!
- Follow the recipe all the way through the cutting step.
- Place the raw dough rounds on a tray and freeze until solid, then bag them.
- To Bake: When you're ready for fresh scones, place them on a baking sheet, let them thaw for about 30-60 minutes, brush with egg wash, and bake as directed. You may need an extra 2-3 minutes of baking time.
- The Secret to "Day Two" Scones: Reheating- Pogácsa is always best when the fats are slightly warm. If your scones are a day or two old, never use a microwave-it will make them rubbery!
- The Oven Method: Place them in a 150°C (300°F) oven for 5-8 minutes.
- The Air Fryer Method: This is my favorite! Put them in the air fryer at 160°C (320°F) for 3 minutes. It makes the outside crispy and the inside pillowy soft again.

Timea's Pro-Tips for Perfect Pogácsa
If you want your Hungarian Crackling Scones to look like they came straight from a Budapest bakery window, keep these three golden rules in mind:
- The "No-Twist" Rule: When you are cutting out the dough rounds, press the cutter down firmly and pull it straight back up. Never twist the cutter! If you twist, you "smear" the edges of the dough together, which seals the layers shut. To get that beautiful, accordion-like rise, the layers must remain open on the sides.
- Watch the Egg Wash: When brushing the tops with your beaten egg, be careful not to let the egg drip down the sides of the scones. Just like twisting the cutter, the egg acts like glue. If it drips down the sides, it will stick the layers together and prevent the scone from rising tall and straight.
- Don't Rush the Rests: I know it's tempting to skip a 20-minute rest period when you're in a hurry, but don't do it! Resting allows the gluten to relax. If the gluten is too tight, the dough will fight you when you roll it, and the scones will shrink and toughen in the oven instead of staying light and airy.
- The Scoring Secret: When you score the top in that diamond pattern, make sure your knife is very sharp. You only want to cut about 2-3mm deep. This doesn't just look pretty; it creates "fault lines" on the surface that allow the dough to expand upward evenly rather than bursting out the sides.
Frequently Asked Questions (FAQ)
While you can use butter, the texture will change. Lard has no water content and a higher melting point, which is what creates that specific "short" and flaky Hungarian texture. If you must use butter, make sure it is very cold and high-quality, but for the most authentic flavor, lard is highly recommended.
Look for "Pork Rinds" or "Pork Scratchings" in the snack aisle, or check a local European/International deli. If you can't find them pre-packaged, you can ask your butcher for pork fat with skin and render your own at home!
Yes! You can prepare the dough and do the folding, then keep it in the refrigerator overnight. The slow fermentation in the fridge can actually develop a deeper flavor. Just let the dough sit at room temperature for about 30 minutes before the final roll and cut so it's easier to work with.
This is often caused by over-baking or having the oven temperature too low, which dries them out. Make sure your oven is fully preheated to 180°C (Fan). Also, ensure you didn't skip the sour cream-it is essential for a tender, soft crumb.
Yes, pogácsa is traditionally a salty snack. However, different brands of cracklings have different salt levels. I always recommend tasting a small piece of your crackling first. If it's already very salty, reduce the added salt in the dough slightly.
Join Timea's Kitchen Community!
I can't wait for you to experience the incredible aroma of these Hungarian Crackling Scones filling your home. If you enjoyed this recipe, please let me know in the comments below! To make sure you never miss a new traditional recipe or a kitchen secret, come and join our growing community of food lovers.
Follow us on Facebook, Instagram, and Pinterest for daily inspiration and behind-the-scenes peaks. For step-by-step tutorials and quick cooking tips, be sure to subscribe to our YouTube channel and follow us on TikTok. Seeing your beautiful bakes makes my day, so don't forget to tag @TimesKitchen when you share your photos!
Related
Looking for other dough recipes like this? Try these:


Authentic Hungarian Crackling Scones (Tepertős Pogácsa)
Equipment
- 1 electric food chopper
- 1 stand mixer
- 1 Rolling Pin
Ingredients
For the Dough
- 180 g pork cracklings tepertő, whole
- 500 g all-purpose flour
- 7 g dried yeast one packet
- 1 tablespoon pork lard
- 1 tablespoon salt adjust based on saltiness of cracklings
- 1.5 teaspoon ground pepper freshly ground
- 300 ml sour cream
- 1 pc whole egg room temperature
- 1 pc egg yolk room temperature
For the Topping
- 1 pc whole egg beaten, for egg wash
Instructions
- 1. Prepare the Crackling Paste- Place the whole pork cracklings into an electric chopper. Blend until they form a smooth, uniform paste. Set aside.
- 2. Mix the Dough- In the bowl of a stand mixer fitted with a dough hook, add the flour, salt, pepper, lard, whole egg, egg yolk, sour cream, dried yeast, and the prepared crackling paste.
- 3. Knead and First Rest- Start the mixer on low-medium speed. Knead until the dough is smooth, elastic, and no longer sticks to the sides of the bowl. Place in a clean bowl, cover, and let rest for 30 minutes.
- 4. The Lamination (Folding)- On a lightly floured surface, roll the dough into a 1cm thick rectangle. Fold the top third down and the bottom third up (like a letter). Then fold the sides into the middle to form a square. Cover and rest for 20-30 minutes. Repeat this rolling and folding process 3 times in total.
- 5. Shape and Score- Roll the dough out one last time to a thickness of 2-2.5cm. Using a sharp knife, score a diagonal cross-hatch pattern on the top. Use a 5cm round cutter to cut out the scones (press straight down, do not twist!).
- 6. Final Rise and Egg WashPlace the scones on a baking sheet lined with parchment paper. Brush the tops with the beaten egg (do not let it drip down the sides). Let rest for 20 minutes.
- 7. BakePreheat your oven to 180°C (350°F) Fan. Bake for 15-18 minutes until deep golden brown.
Video
Notes
- Cutter Tip: Never twist the biscuit cutter! Twisting seals the edges and prevents those beautiful flaky layers from rising.
- Storage: Store in an airtight container at room temperature for up to 4 days.
- Serving: Best served slightly warm alongside a bowl of Goulash or Bean soup.
Nutrition
This post contains affiliate links. Read the full disclosure here.


Laci says
You must try these delicious scones!